Show Posts

This section allows you to view all posts made by this member. Note that you can only see posts made in areas you currently have access to.


Messages - Remzi

Pages: 1 ... 4 5 [6] 7
76
1530USB Datasette to PC Adapter / Re: Share your results
« on: August 08, 2019, 08:19:03 PM »
Thank you for joining the forum and giving an update Marty.

I'm glad to see,it worked well for you.

77
If you want your turbo load games to load twice quicker,you can reduce the avarage bit duration and increase the frequency.


You might need to carry on some maintenance work on your tape deck like cleaning the heads/pinch roller also change the drive belt.
If you have a new old stock tape deck and cassette,try avarage bit duration 117,that is the lowest I could manage.


78
Other MODs / Powering The PI1541 From The Tape Port
« on: March 12, 2019, 01:21:25 PM »


I tried to power the PI1541 through the USB port first.It was getting stuck at the "searching for" screen.

I checked the voltages on the USB pads and the GPIO pins and found out there is a 0.7V voltage drop between them.That shows the USB power protection and regulator circuit is using quite a bit of power.
So I connected the power from the tape port direct to the GPIO pins.


It is possible to reduce the power consumption of Raspberry PI by disabling the HDMI,WIFI,Bluetooth,Ethernet and USB ports.I added the commands to config.txt file on the SD card.

Code: [Select]
dtoverlay=pi3-disable-wifi
dtoverlay=pi3-disable-bt
tvservice -o
dtparam=act_led_trigger=none
dtparam=act_led_activelow=on
tee /sys/devices/platform/soc/3f980000.usb/buspower >/dev/null

kernel_address=0x1f00000
force_turbo=1

I tried hooking it up to my LCD TV with the HDMI cable and found out it was still working.So these commands didn't do a thing.I will try to contact Steve White and ask him about this.

79
Adjusting th step down buck converter:

Apply 12V DC to input of the module and monitor the output with a multimeter.Turn the screw clockwise to drop the voltage to 5V or 5.1V.


80
A friend from Italy asked me to help him making this mod.I will go in to more detail.

STEP 1 Building the battery pack:

Shopping list.

1 X Battery Charger Protection Board Module

6 X 18650 Batteries

1 X DC-DC Step down buck converter

1 X Soldering Iron

1 X Multimeter


Making the PSU connector cable:

You need the cut off the DIN connector from an old C64 PSU.


Plug in the DIN connector and find the continuity to the leg in the image above.


81
DC/Battery Powered Commodore 64 / Re: Internal Battery Pack Mod for C64C
« on: January 12, 2019, 07:50:22 PM »

82
DC/Battery Powered Commodore 64 / Internal Battery Pack Mod for C64C
« on: December 16, 2018, 11:50:31 AM »


Correction to the video!!! +12V DC is taken from the third pin from left on the userport output and connected to DC to DC step down voltage regulator.


This is how it looks like once it's finished.


First thing you have to do for this project is disconnecting one of the legs of the resistor at the R19.
This is very important as it overheats when we are running on DC only.
Remove the fuse as it's useless and also if you plug in the regular power supply by accident,removed fuse will save your C64C.


I salvaged 6 Li-ion 18650 batteries from an old laptop battery pack.I recharged them using a li-ion charger and made sure they are all at close capacity before making a 3S pack.
This is the battery protection board that I used for this project.


Other side of the board.


That is where I soldered the +12V out from the battery pack.


Also (-) from the battery pack soldered to ground.


We also need 5V to run our C64.For this I used a Step Down Voltage Regulator.
As it is adjustable,you need to set it to 5V before connecting it to your C64 board.


In the image above,you can see how I connected the voltage regulator to the board.


I used an old router power supply for this project.It provides 12V at 1A.
It can charge the battery pack in about 1,5 hours and gives me up to 2 hours play time.
If you want to charge while using your C64,you should get an at least  1.5A rated power supply.


This is the diagram,how you need to wire up the power connector.


This is the 2.4Ghz AV transmitter module.If you want to buy a ready made one,follow this link.


For the TOD clock signal generator,take a look at Pasi Lassila's Blog Entry.

I ordered a NE555 Adjustable Module for the TOD generator.Once I recieved it,I will update this tutorial.

Check out this video.

83
DC/Battery Powered Commodore 64 / External Battery Pack Mod
« on: December 16, 2018, 10:30:27 AM »
This is an experimental project.Try at your own risk

Board no 250469 (short board) the 10 ohm resistor at the R19 overheats.Needs to be disconnected before using DC only power.

I am not sure about long boards.I will test them out.

Running the C64 on DC only is not a new thing.It's been tried many times.Check out Ilker's Project.

The only thing doesn't work with the C64 is TOD chip.Which is used by very few software.It is possible to do a small modification on the motherboard by adding a 555 timer to overcome this problem.I haven't tried it myself yet so I can't say much about it just yet.

Here is the finished Battery pack,


(That 3.5mm jack is used for powering my SD2IEC so I don't have to use the cassette port.)

This is a regular power bank with standart USB 5V and 9V/12V/15V adjustable power outputs.

Idea is feeding 12V or 15V DC (depending on the C64) to AC rail on the userport output.And of course 5V DC to 5V rail.

5V output of this power bank is useless as under load it drops down to 4.5V.C64 still works with this voltage but SD2IEC is not really happy about it.

That's the reason I had to use a step down converter to get a solid 5V output from the power bank.


The photo above shows the edge connector,power switch and the converter module installed to the front panel.


I soldered the GND and the 12/15V wires to the DC socket.This power bank came with a small push switch on it's side.I couldn't find any info about the purpose of this switch,I tried everything.I came to a conclusion that this switch is useless so i converted to the reset switch for the C64.


I cut the trace on the board,soldered the reset line on the other leg.

There are a couple of issues with this battery pack.

1.Datasette doesn't work.It seems like it's not powerful enough to supply enough current.I'm testing out larger power banks.

2.You can charge the battery pack with a regular 5V 2A USB charger while you are using your C64 but power bank gets really hot after half an hour.Culprit is the inductor right next to the micro USB connector.Some sort of a heatsink or cooling fan might be an option.Or I can use a different power bank charged with a 12V power source.


84
Wireless Audio Video Solutions / 2.4Ghz AV Transmitter,Receiver Kit
« on: December 15, 2018, 01:45:42 PM »
Price (Including postage,paypal fees) and delivery time
£15 to UK,2nd Class large letter,2-5 days
£18 to Europe,Airmail (non tracked) 3-10 days
£20 to rest of the world,Airmail (non tracked) 3-15 days

Buy It Now


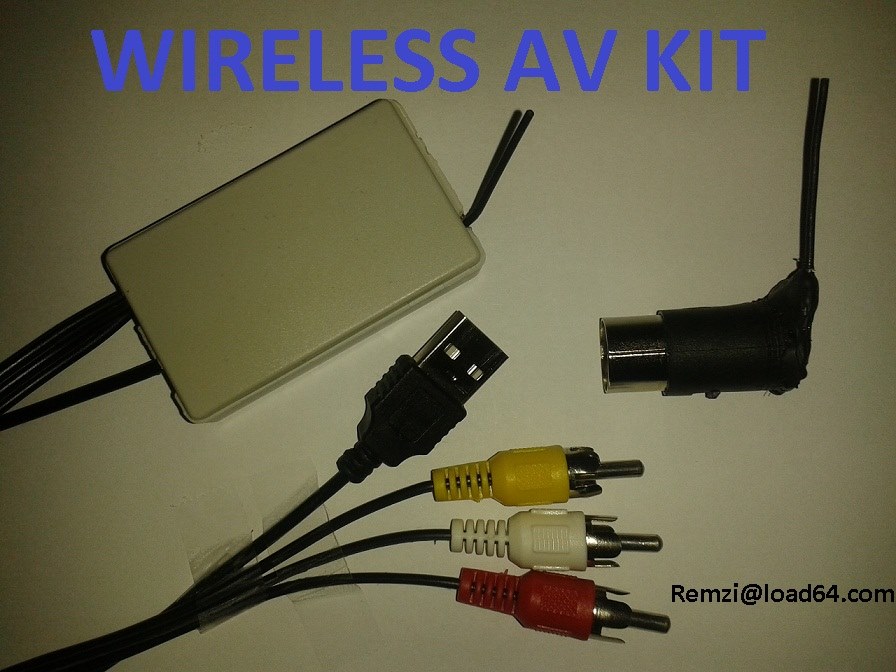
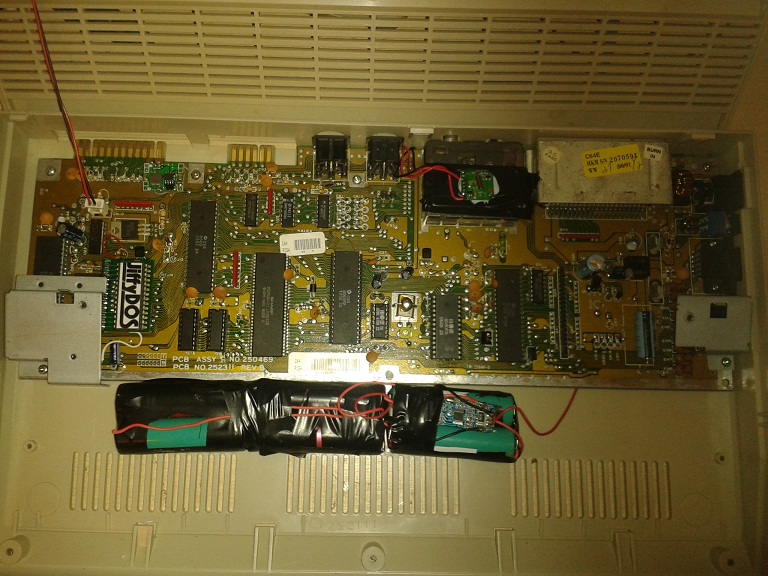
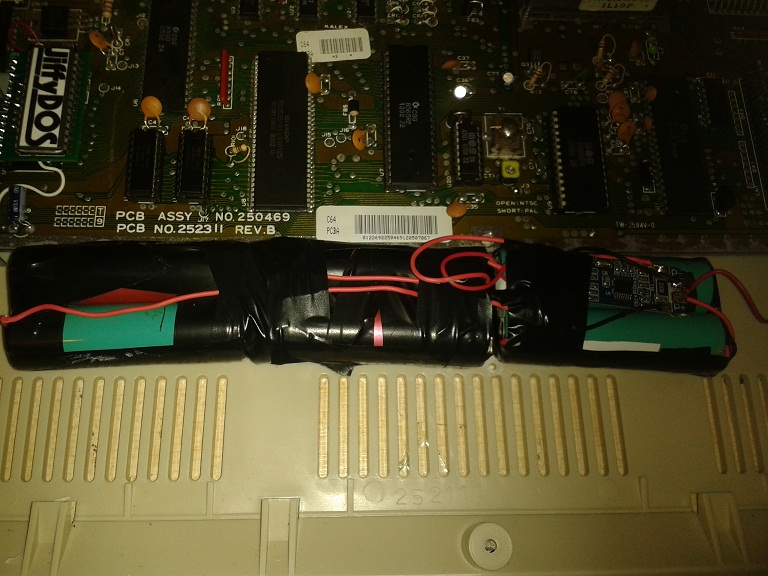
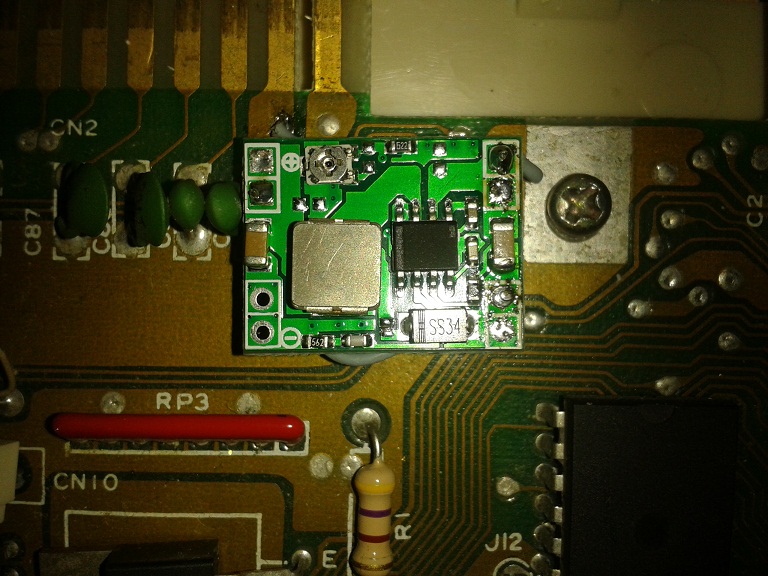
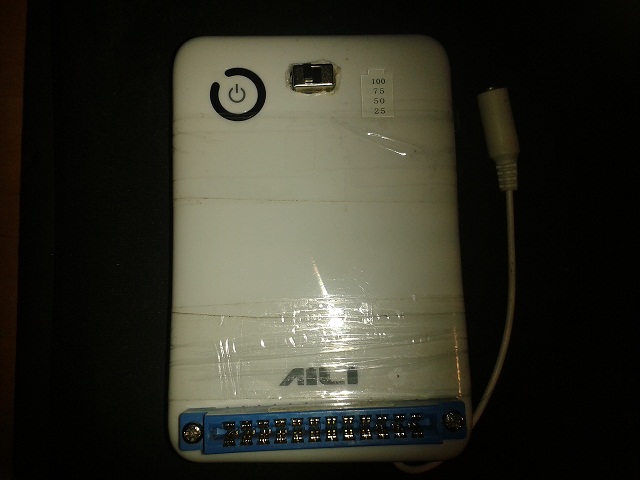
Do you want to place your C64 on your coffee table and enjoy retro gaming in your living room on a massive TV set without running a cable from the C64 and the TV? This is it,what you've been waiting for.Make your beloved C64 portable.

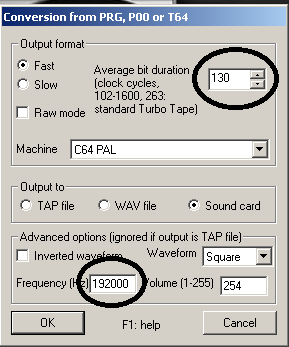
It runs on 2.4Ghz frequency which is not that crowded as it used to be.Most internet modem routers are running on 5.8Ghz these days.
Your only enemy is bluetooth devices like phones,headsets even computer mice.If you turn them all of,you should get no interference.Unless you live in flats and your neighbours are using 2.4Ghz WI FI  >:(

The main problem we have with our 64's is,composite video out is non standart.Which leads to some TV's and monitors giving very good result,some are ok but not that good,bit of colour leak,dot crawl,shadowing and some are not working at all.

If you want to use this wireless kit,you have to try the wired composite cable with your screen first and find out if your TV can give good results.

If you get good result with the wired cable,you will get the exact same result with this wireless kit.

If not,please don't buy it.I am not accepting returns on this product.


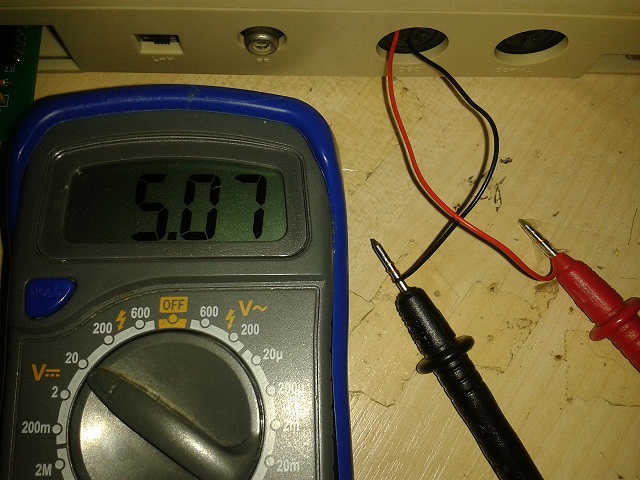
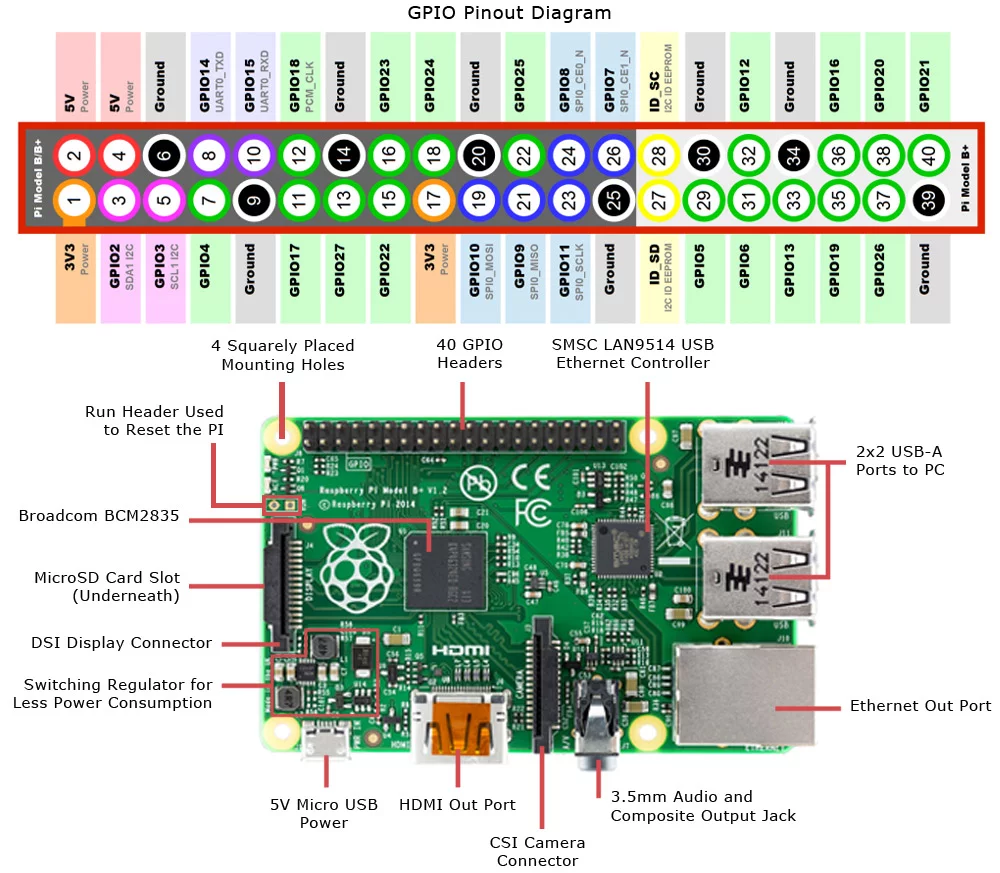
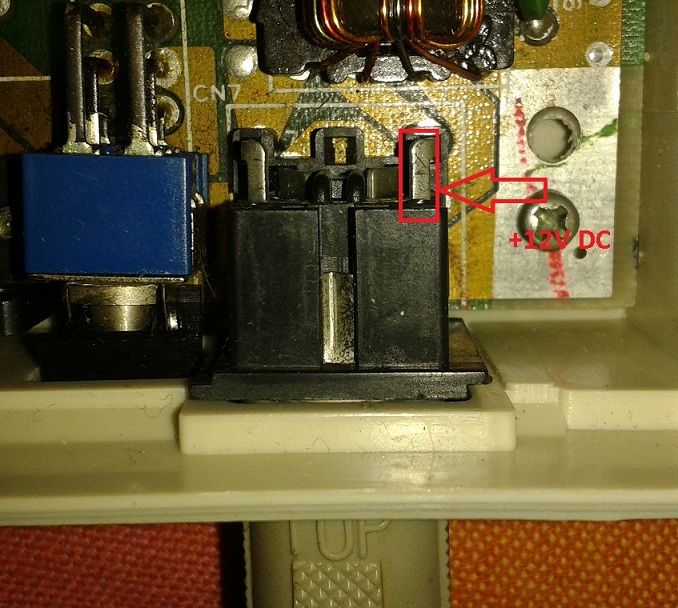
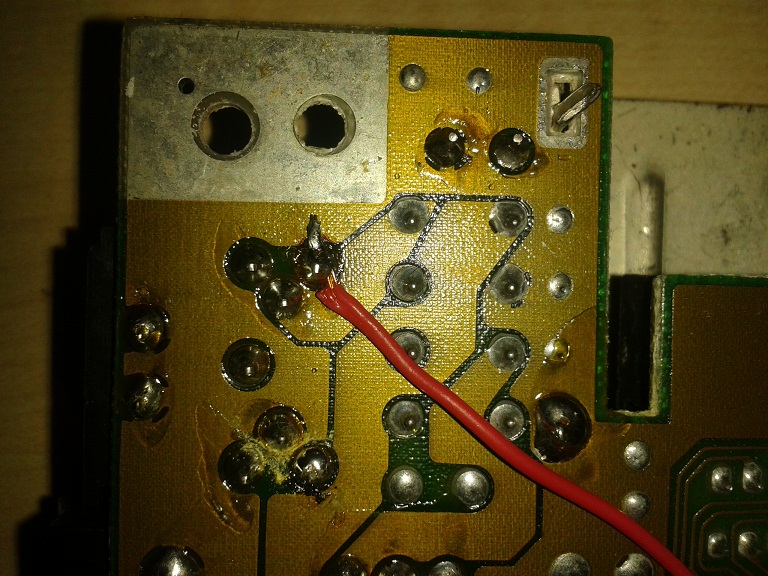
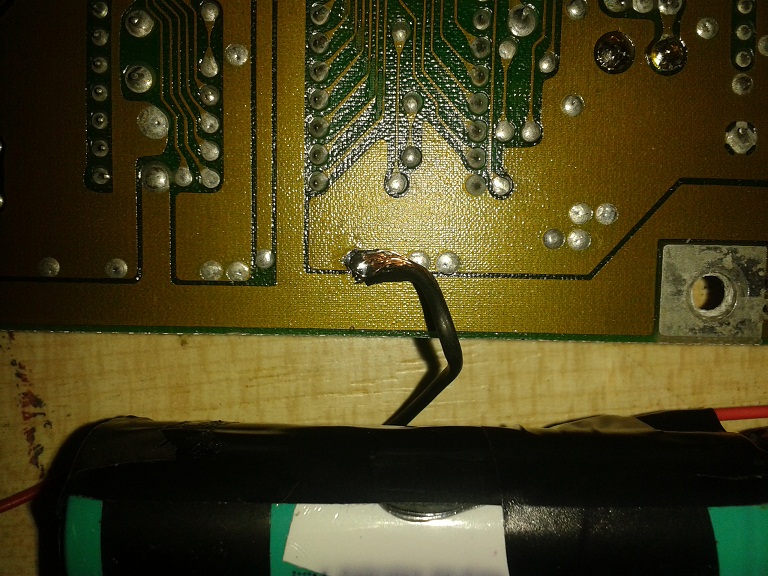
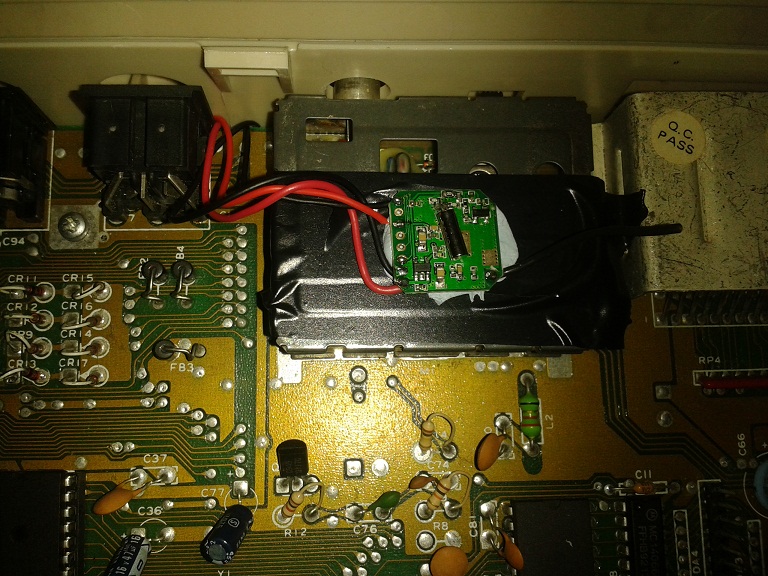
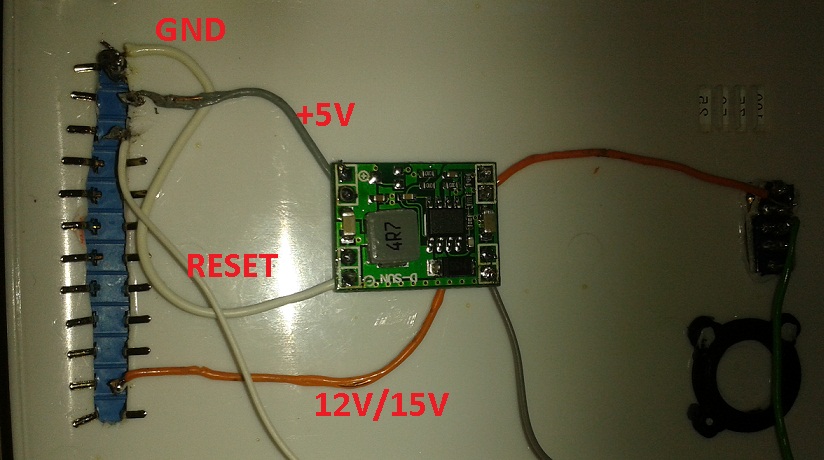
Transmitter is powered by the pin 8 of the C64's AV port.Most C64C's have the 5V connected to the pin 8.But some breadbins with the very early boards are not connected.This is the reason before buying this kit,you have to make sure you have 5 volts on your AV port.

You will need a multimeter and have to stick 2 cables into the port while it is switched on.Be very careful,don't short it.


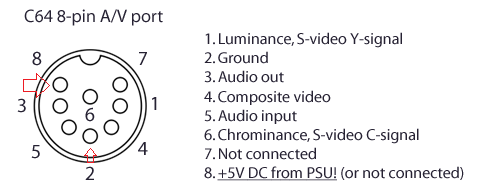
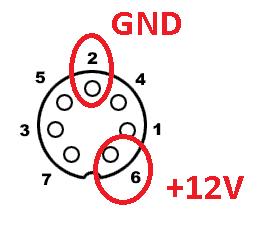
Black (Ground) to Pin2, Red (Positive) to pin 8

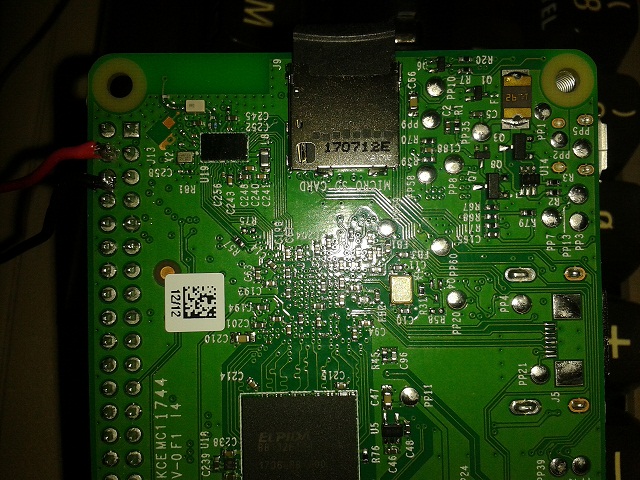
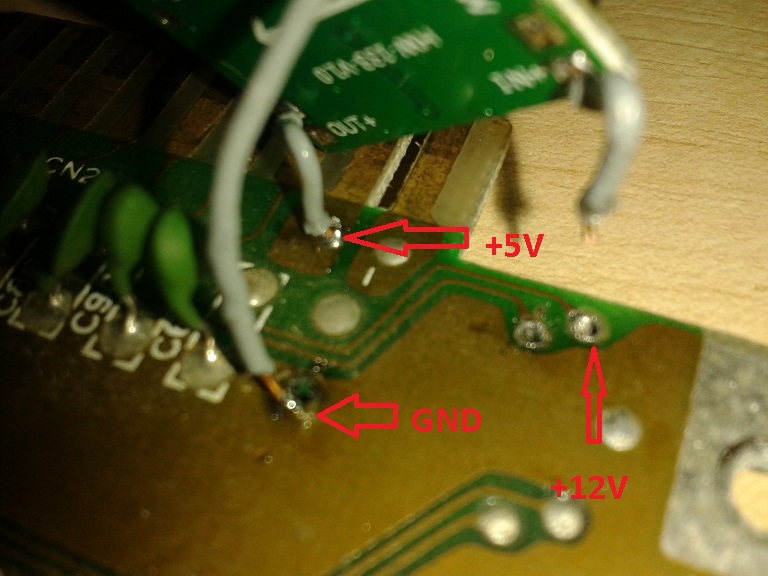
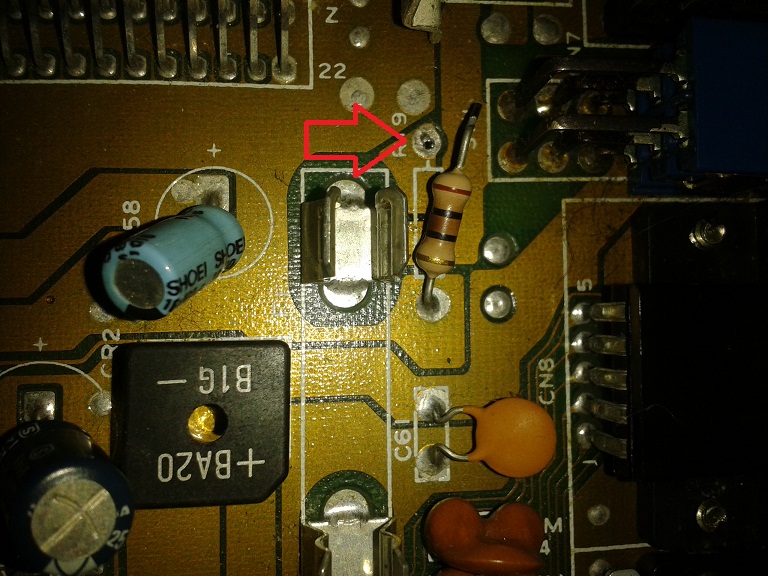
If you get 0V means it is not connected to live 5V.You need to modify the motherboard which requires some soldering skills and equipment.

If you get less than 4.7V or more than 5.2 volts,your PSU is on it's way out,replace it.

If you have any questions,please post it under this topic.


85
1530USB Datasette to PC Adapter / Re: 1530USB Adapter not working.
« on: November 24, 2018, 06:31:03 PM »
No probs mate.I will post a replacement on monday morning.Sandwiched PCB is getting damaged in transport I guess,need to design a single one.

86
1530USB Datasette to PC Adapter / Re: 1530USB Adapter not working.
« on: November 24, 2018, 07:51:59 AM »


Can you try to wiggle the adapter in and out while the tape is playing.

87
1530USB Datasette to PC Adapter / Re: 1530USB - Whining
« on: October 18, 2018, 07:23:55 PM »
Thanks for the update.I hope it will serve you well for many years to come.

88
1530USB Datasette to PC Adapter / Re: Share your results
« on: October 09, 2018, 07:35:32 AM »
Thank you for taking your time,joining this forum and sharing your experience.I really appreciate it.

89
1530USB Datasette to PC Adapter / Re: Using the adapter on LINUX
« on: October 03, 2018, 07:45:57 PM »
In that video,Flavio is using a windows emulator (Wine) for running the Audiotap.

Have a look at audiotaps github page,

https://github.com/fabzzap/libaudiotap

Sorry,I can't help you any further as I am not a Linux user  :'(

90
1530USB Datasette to PC Adapter / Re: Share your results
« on: October 03, 2018, 06:56:14 PM »
If you want to use your computer for watching videos etc. while recording software to cassette tapes there is a trick.

Convert the TAP file to WAV file and play it with VLC media player.Go to audio options and audio device,choose the RECORD.


Pages: 1 ... 4 5 [6] 7